Overview
easyvis.io provides services to control and manage your visualization devices. With our open API we connect the digital world to your visualization devices.
Table of contents
Architecture
easyvis.io provides visualization-as-a-service which means once you are registered with us that you can easily access our service via our API or through the console. easyvis.io can be seen as a visualization middleware which abstracts all the complicated device setup, management and control logic.
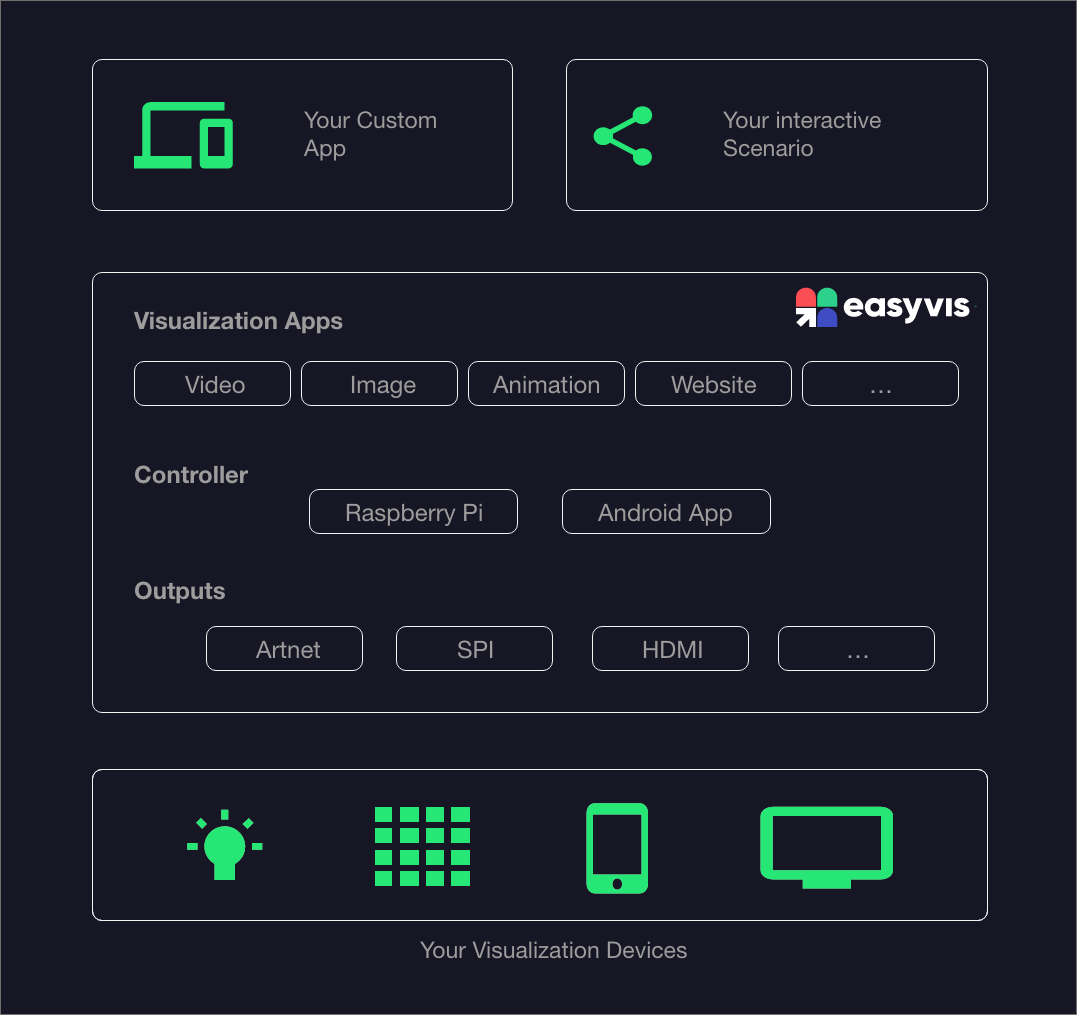
There are three main concepts which you should be aware of:
- Visualization Apps: Small apps which allow you to visualize a certain kind of digital content (e.g. videos, images, animations, websites, …). These apps can be called directly via the API.
- Controller: There are two posssible controllers. The Raspberry Pi controllers focuses on visualizing content on LED light solutions while the Android App is for high definition visualization content targeting TVs and tablets
- Outputs: A controller can support multiple outputs at the same time so that a variety of visualization devices can be controlled by one controller. For adressing different outputs multiple protocols (e.g. Artnet, SPI - WS2812 or HDMI) are supported.
API Endpoint
https://api.easyvis.io/v1
How to read this guide
In this guide, we will show you step-by-step how you can use the easyvis visualization-as-a-service.
In the How-to-get-started you will learn how to setup the raspberry pi and use it to connect your visualization devices to the easyvis service. We will also outline how to use the API.
In the Basics basic concepts in easyvis are described. For example you find all information about authentication.
The Visualization Apps section describes each visualization app in detail and shows you how you can easily bring your digital content to your visualization devices
In the Visualization Devices section each device which can be connected to easyvis.io is described in detail and it is outlined how you can setup and configure the device.