Authentication
Table of contents
General
The easyvis.io authorization is based on oauth2. To use easyvis.io API an access token is required which can be acquired in multiple ways.
Acquiring an access token
To acquire an access token you need the following parameters to be used in the requests:
CLIENT_ID: check your App Clients in your profile
CLIENT_SECRET: check your App Clients in your profile
REDIRECT_URI: check your App Clients in your profile
AUTH_URL:
https://auth.easyvis.io
For acquiring an access token we distinguish between the implicit approach which directly returns the token and the authorization code grant approach which has one indirection. The authorization code grant should be preferred for a more confidential approach.
Implicit Grants
By using the implicit grant type of oauth2 an access token is returned immediatelly without an additional exchange of an authorization code. For that the AUTH_URL/login endpoint is used so that you can sign in with your easyvis.io credentials. After a successful login an access token is provided which can be used to use the API.
For more information, see the OAuth2 implicit grant documentation.
Using a Browser
Via the /login auth endpoint a GET request can be made via a browser to get the access token to use the API. Fill in the AUTH_URL and CLIENT_ID in the url below, log in with your easyvis.io credentials and retrieve the access token provided in the url to which you have been redirected.
GET AUTH_URL/login?
response_type=token&
client_id=CLIENT_ID&
redirect_uri=REDIRECT_URI&
state=STATE&
scope=email
Using Postman
For a quick API test postman is the perfect tool and it provides a lot of build-in functionality. Follow these steps to get an access token with postman and use it to access the API.
- Create a new request
- In the Authorization tab click Get New Access Token
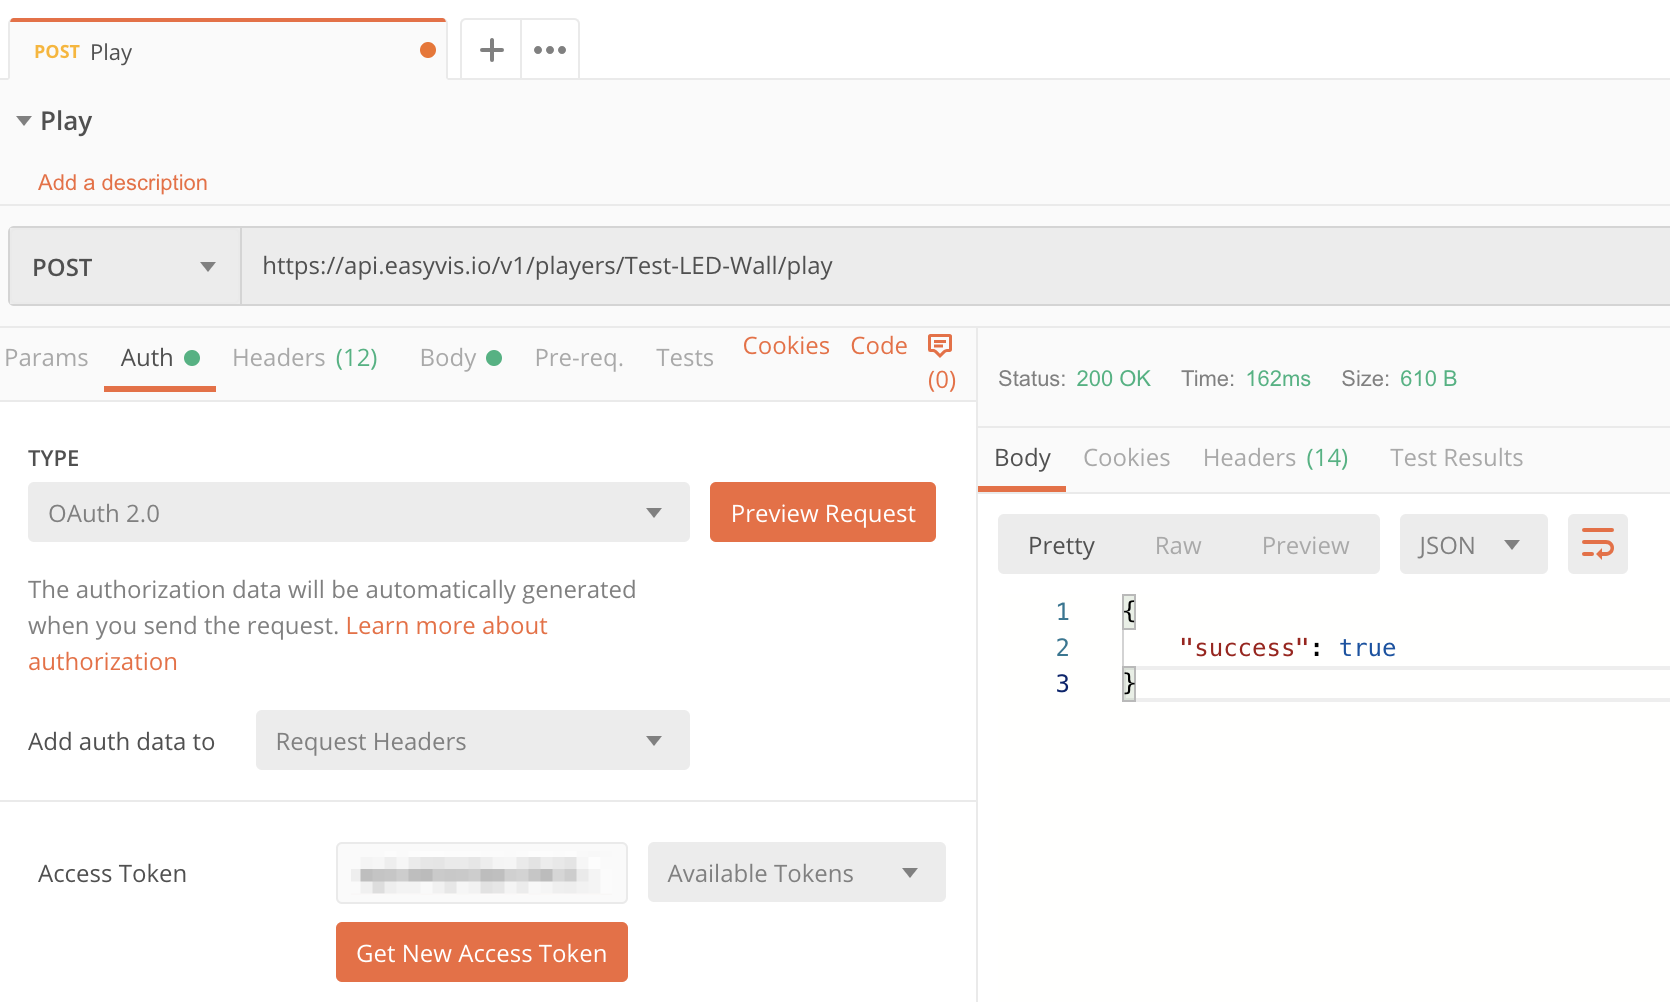
- Fill in the authorization details with your credentials (use the /login endpoint for the auth url: AUTH_URL/login)
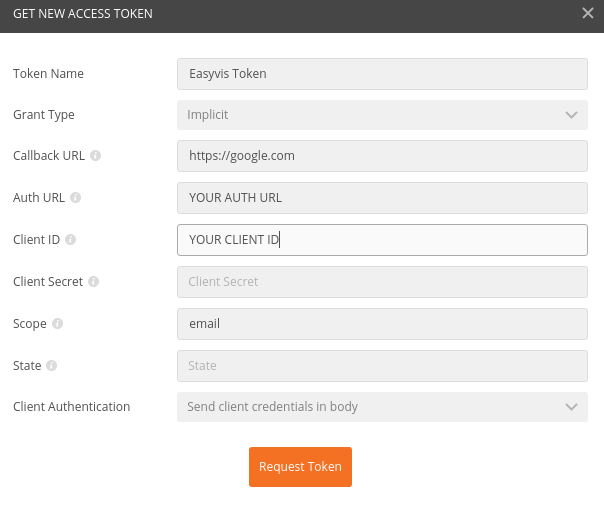
- In the easyvis.io login screen enter your easyvis.io credentials
- If your credentials are correct, add the provided access token to your request header by pressing Use Token
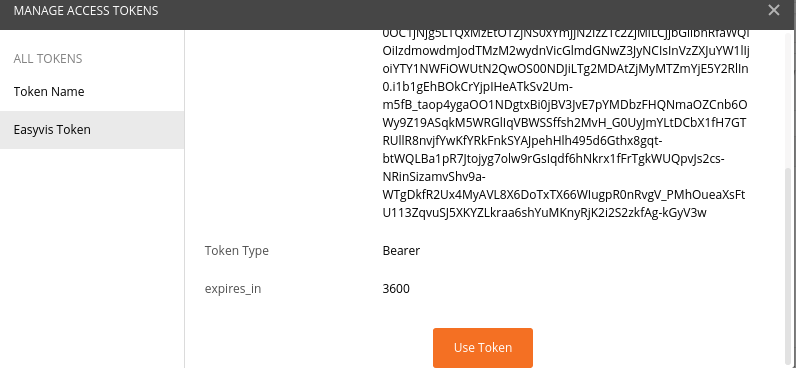
- You are ready to go and can access the API.
Authorization Code Grant
The Authorization Code grant type is used by confidential and public clients to exchange an authorization code for an access token. After the user returns to the client via the redirect URL, the application will get the authorization code from the URL and use it to request an access token.
- Request the authorization code
GET AUTH_URL/login?
response_type=code&
client_id=CLIENT_ID&
redirect_uri=REDIRECT_URI&
state=STATE&
scope=email
Extract the AUTHORIZATION_CODE from the returned url
- Exchange an authorization code for an access token
POST AUTH_URL/token&
Content-Type=application/x-www-form-urlencoded
---
grant_type=authorization_code&
client_id=CLIENT_ID
code=AUTHORIZATION_CODE&
redirect_uri=REDIRECT_URI
Use the provided ACCESS_TOKEN to do easyvis.io API calls.
Refresh Token
In case you want to refresh your access token use the following command:
POST AUTH_URL/token&
Content-Type=application/x-www-form-urlencoded
---
grant_type=refresh_token&
client_id=CLIENT_ID
refresh_token=REFRESH_TOKEN
Calling the API with your access token
Once an ACCESS_TOKEN has been acquired the easyvis.io API can be used by adding your access token and api key (which you find in your profile) to your requests:
Authorization = Bearer ACCESS_TOKEN
x-api-key = API_KEY